



TABLE OF CONTENTS
Key Takeaways
- Pool test kits use reagent drops to measure key water levels like chlorine, bromine, and pH.
- Accurate testing depends on proper sample collection, clean test cells, exact drop counts, timing, and good lighting.
- Always collect water below the surface and away from return jets, skimmers, or chemical feeders.
- Gently invert the comparator block to mix — don’t shake it.
- Record results, adjust carefully, and retest after chemical changes, heavy use, rain, or unusual water behavior.
Why Pool Testing Matters
 DID YOU KNOW?
Even small testing mistakes can lead to inaccurate readings and incorrect chemical adjustments.
You’ve opened your pool, the water looks clear, and you’re ready to enjoy it. But before you dive in, add chemicals, or assume everything is balanced, you need to know what’s actually happening in the water.
Because if you are not testing your water, you are just guessing what it needs.
That’s where proper pool testing comes in.
Testing your pool water isn’t just about dipping a strip or filling a vial. How you test directly affects what your results tell you, and what you add to your water next. If your readings are off, you might:
-
- Add chemicals you don’t actually need
- Miss early signs of imbalance
- Create bigger problems trying to fix smaller ones
When testing is done correctly, you:
-
- Get a more reliable reading of your water chemistry
- Catch imbalances before they become bigger problems
- Make smarter chemical adjustments
- Keep your pool cleaner, safer, and easier to manage
Watch the video below for a quick demonstration of how to use a 3-in-1 pool test kit. Or keep reading for a step-by-step guide on test kits plus how they compare to test strips.

Pro Tip
A more precise test is only useful if your technique is consistent. Good testing habits matter just as much as the kit itself.
How Pool Test Kits Work

Pool test kits use reagent drops to create a color change that reveals your water’s chemical levels. Different kits test for different parameters, but most focus on the core readings that matter for routine pool care—like chlorine, bromine, and pH levels.
Some kits focus on core readings, while others include additional parameters for deeper analysis or troubleshooting.
For most pool owners, keeping a few key levels in check is enough to maintain balanced water. The steps below apply to standard pool test kits and can be used across most common setups.
What a Pool Test Kit Measures
Most pool test kits are designed to measure the core levels that matter most for routine pool care. Depending on the kit, that may include:
-
- Chlorine
- pH
- Total alkalinity
And sometimes additional levels depending on the system
These readings help you understand whether your pool water is safe, balanced, and comfortable to swim in.
Want a deeper breakdown of how these levels work together? Check out our guide:
How to Balance Chlorine, pH, and Alkalinity in Your Pool.
What You'll Need
Before you begin testing your pool water, make sure you have everything ready. A proper setup helps ensure your results are accurate from the start.
You’ll need:
-
- A test kit (like the Clarus CPA-TK31)
- A clean test cell or comparator (rinsed with pool water before use)
- A timer or watch
-
Good lighting for accurate color comparison
Having the right setup helps ensure accurate results.
Pro Tip Always test your water after the pump has been running. Circulated water gives you a much more accurate reading.
How to Collect a Pool Water Sample Correctly
Before you even open the kit, make sure you’re collecting the sample the right way.
For accurate results:
-
- Take your sample from elbow depth, not the surface
- Avoid collecting water near return jets, skimmers, or chemical feeders
- Make sure the water has been circulating before you test
Surface water can give misleading results because it’s more affected by sunlight, heat, and air exposure.
Pool water near the surface can test differently than the water below it, especially on hot, sunny days.
DID YOU KNOW?
Once your setup is ready, the testing process itself is straightforward when you follow the steps correctly.
How to Use a Pool Test Kit Step by Step

Step 1: Rinse and Prepare the Test Chamber
Start by rinsing the comparator block (the testing chamber) with pool water.
This removes any residue or contaminants that could affect your reading. A clean chamber ensures your results reflect your pool water—not leftover chemicals from a previous test.
Step 2: Collect and Fill Your Water Sample
Make sure the water is well-circulated before collecting your sample.
Fill each test cell using your collected sample. Avoid overfilling and make sure the water reaches the marked line.
DID YOU KNOW?
Where you collect your sample matters. Surface water or water near return jets can give misleading results, as these areas don’t usually reflect fully circulated water.
Step 3: Add the Reagent Drops
Add the specified number of drops to each test cell using the correct reagent for each measurement.
Follow the drop count exactly as listed in your kit instructions, and hold each bottle vertically so the drop size stays consistent.
Different reagents are used for different readings. For example:
- Chlorine and Bromine: Often tested using an OTO reagent, which produces a yellow color read against the appropriate scale
-
pH: Tested using phenol red, which shifts from yellow to red to indicate acidity or alkalinity
Step 4: Mix and Compare
Cap the comparator block and gently invert, not shake, to mix. Compare the water color to the chart provided with your test kit, matching your sample to the closest color range.
Read results within the recommended time window. Waiting too long can cause colors to shift and lead to inaccurate readings.
If the levels are low, the water colors may appear faint and harder to see. For better accuracy, hold the comparator block against a white background when reading the results. A plain sheet of printer paper works well.
Warning
Step 5: Record Your Results
Write the numbers down or log them in your phone. Tracking results over time makes it much easier to spot patterns and drifting chemistry.
Pro Tip Follow the kit’s instructions exactly, including wait times. Reading too early or too late can change the result.
Step 6: Adjust Your Levels
Once you have your results, decide whether your levels are within range or need adjustment.
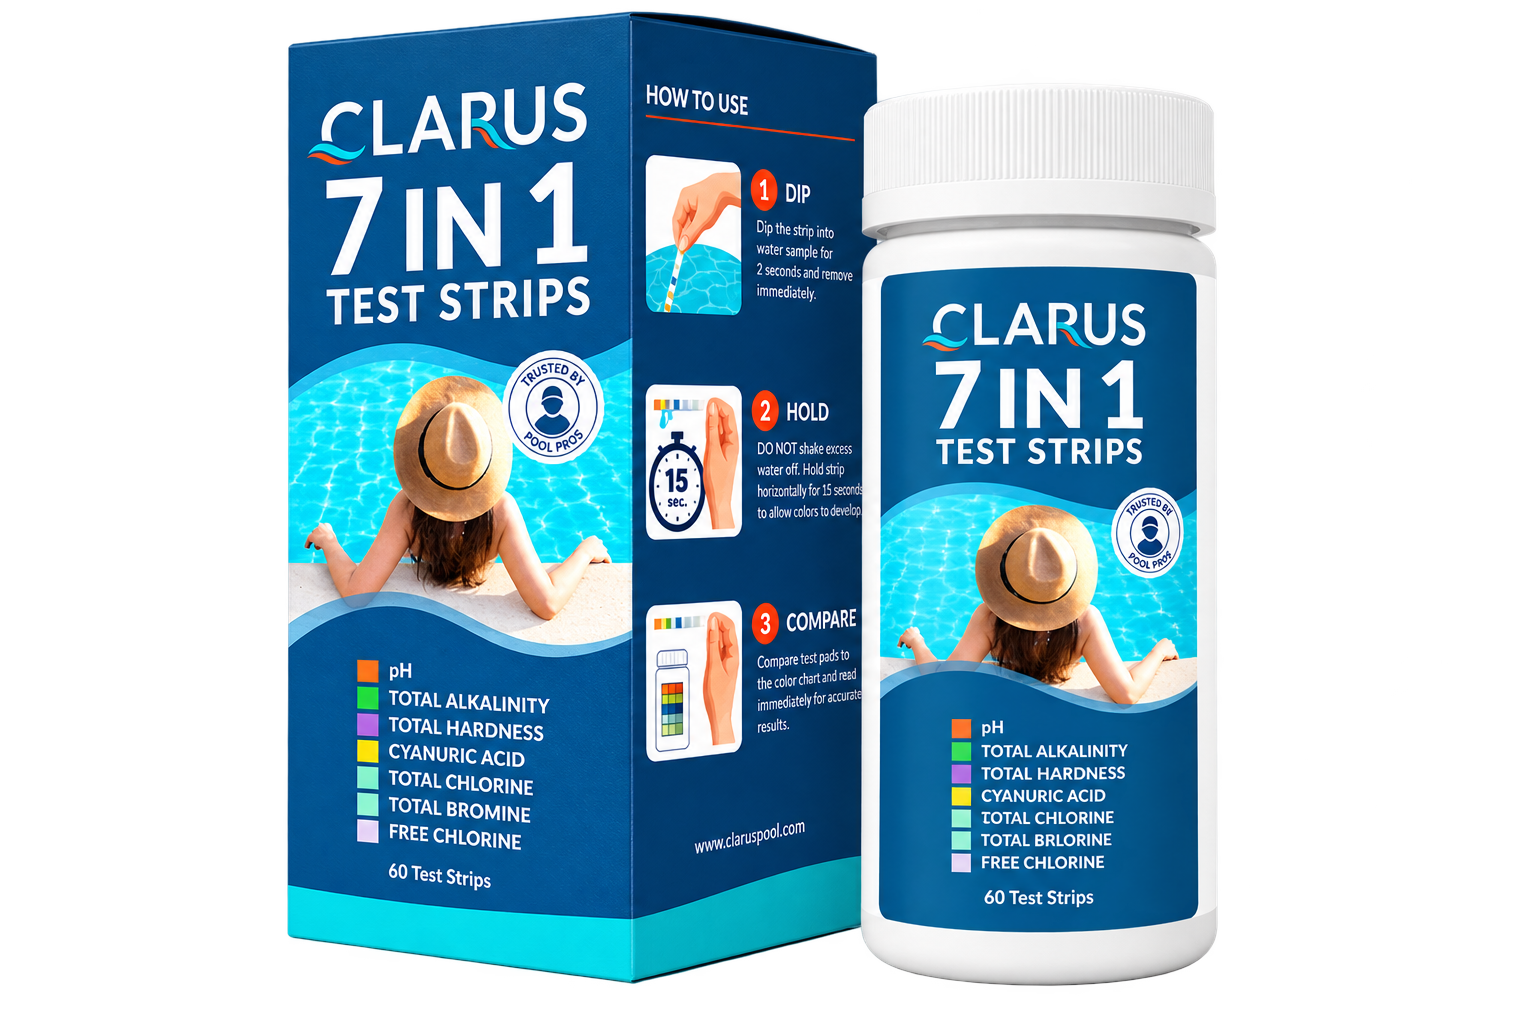
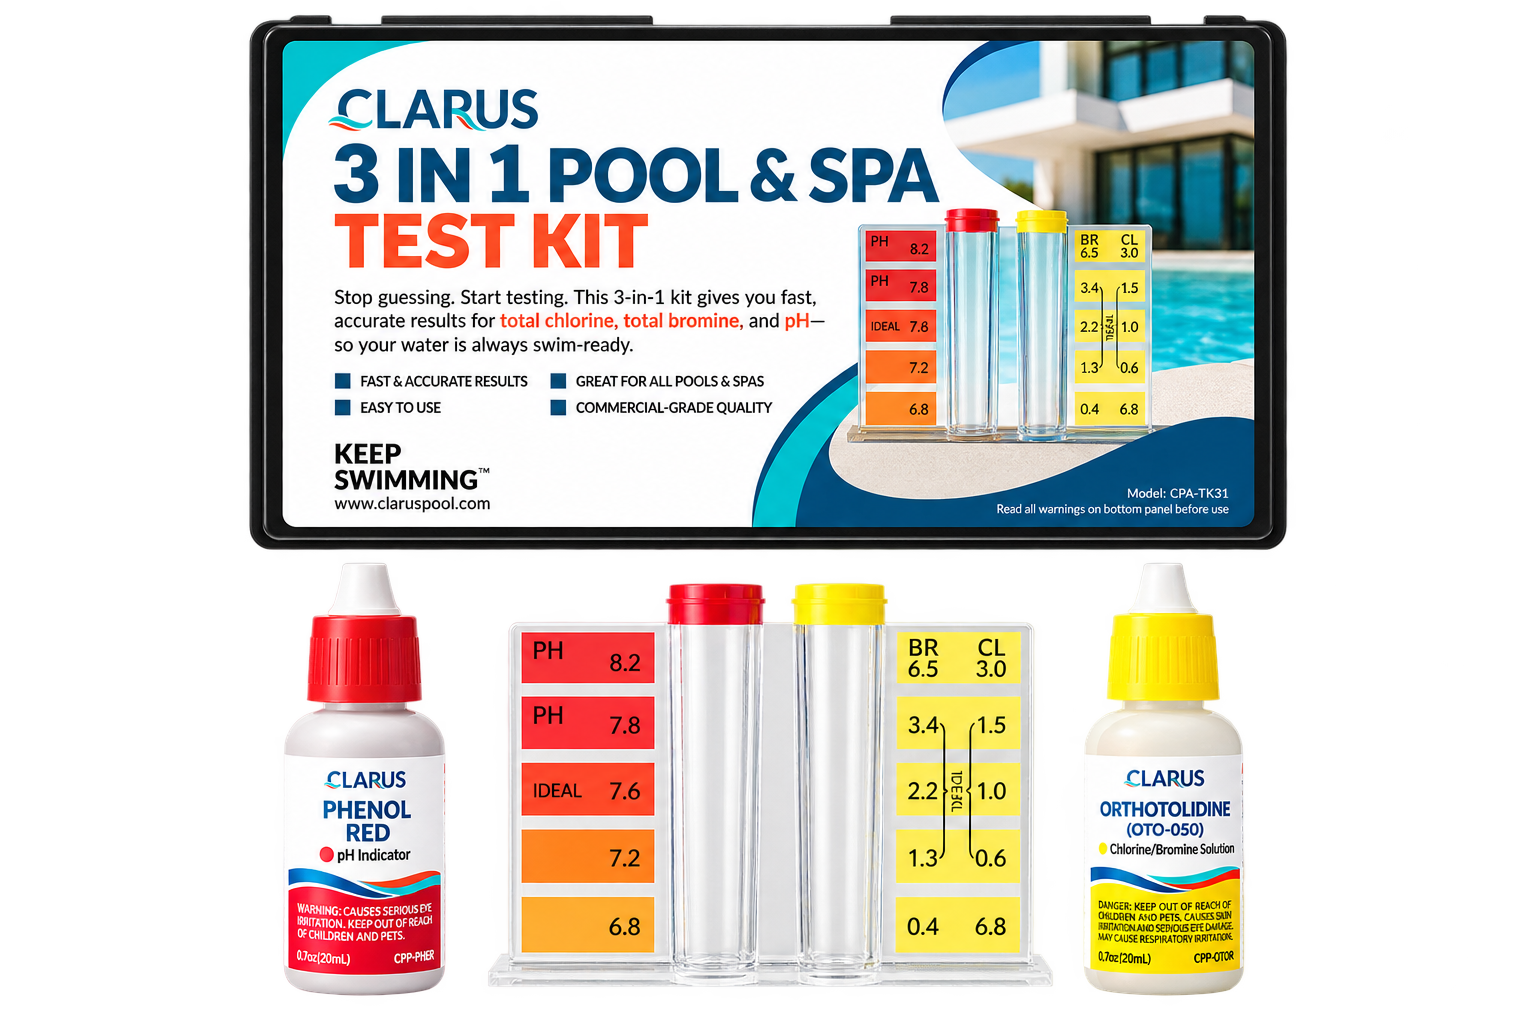
Feature
Test Strips Test Kits
Ease of Use
Very simple (dip and read) Requires more steps and precision
Speed
Fast (seconds) Slightly slower
Accuracy
Good for routine checks More precise and consistent
Cost
Lower upfront cost Higher upfront cost
Ideal Use
Quick, frequent testing Detailed readings and verification
If levels are out of range:
-
-
Add the appropriate chemicals to bring them back into balance
- Avoid making multiple adjustments at once
- Allow time for the water to circulate
- Retest to confirm your changes worked
-
Add the appropriate chemicals to bring them back into balance
Make one adjustment at a time and retest after circulation to confirm your results.
How to Read Pool Test Kit Results
Once you get your readings, the next step is understanding what they actually mean for your water.
It’s not just about matching colors—it’s about knowing what to do next.
-
- Low chlorine → your water may not be properly sanitized
- High or low pH → can affect comfort, chlorine performance, and equipment
- Unstable alkalinity → makes pH harder to control and leads to constant adjustments
- Low chlorine → your water may not be properly sanitized
If you’re using bromine instead of chlorine (common in spas), follow the same process—just compare against the bromine scale on your kit.
You don’t need to fix everything at once. In fact, you shouldn’t.
Start with the biggest imbalance, make one adjustment, let the water circulate, and then retest.
That’s how you stay in control instead of chasing numbers.
Warning
If my pool looks clear, my water is balanced
Clear water doesn’t mean balanced. Testing confirms it.
VS


Common Mistakes That Throw Off Your Results
Test kits are precise—but only if you use them correctly.
Small mistakes can lead to inaccurate readings, which often leads to overcorrecting your water or fixing the wrong problem entirely.
The most common issues include:
-
- Using a dirty test cell
- Collecting water from the wrong spot
- Filling above or below the sample line
- Adding the wrong number of drops
- Reading colors in poor lighting
- Using old or poorly stored reagents
- Testing immediately after adding chemicals
- Using a dirty test cell
Any of these can skew your results and make your water seem out of balance when it isn’t, or worse, hide a real issue.
Pro Tip Store your test kit in a cool, dry place. Heat, sunlight, and humidity can degrade reagents and reduce accuracy over time.
When to Retest Your Water
One test isn’t always enough, especially after making changes.
After adjusting your water, give your system time to circulate before testing again. This ensures your readings reflect fully mixed water, not concentrated pockets of chemicals.
You should retest:
-
- After adding chemicals
- After heavy rain or water dilution
- After high bather load
- If your water suddenly looks, smells, or feels off
- If your results don’t match how your pool is behaving
- After adding chemicals
Retesting confirms whether your last adjustment worked and helps you avoid chasing the wrong fix.
Storing and Maintaining Your Test Kit
A test kit is only as reliable as the condition it’s kept in.
Proper storage and basic maintenance help ensure your results stay accurate over time.
Warning
-
- Store in a cool, dry place
- Keep bottles sealed tightly and upright
- Avoid using old reagents from previous seasons
- Rinse the test chamber after each use
-
Let all components air dry before storing
Taking a few extra seconds to care for your kit protects its accuracy and your pool.
How to Make Water Testing Easier to Stick With
Using a test kit is more hands-on, but it doesn’t have to feel like a chore.
The key is consistency, not complexity.
Make it easier by:
-
- Keeping your test kit somewhere easy to grab
- Testing on the same days each week
- Pairing testing with another routine (like skimming or emptying baskets)
- Logging results to spot patterns over time
- Using your test kit for confirmation—not just when something goes wrong
- Keeping your test kit somewhere easy to grab

Pro Tip If pool care feels unpredictable, the problem usually isn’t your chemicals, it’s your routine.
Test Kits vs. Test Strips: Which One Is Better?
When it comes to testing your pool water, both test kits and test strips are commonly used. The difference comes down to speed vs precision.
Which Should You Use?
For most pool owners, test strips are a convenient option for quick, regular checks.
Test kits are better suited for:
-
- Confirming readings
- Troubleshooting water issues
- Making more precise chemical adjustments
Many pool owners use both:
-
- Strips for routine monitoring
- Test kits when accuracy matters—like after high bather load or when you want to confirm a test strip result
Accurate pool testing comes from both the tool and how you use it. The best method is the one you use consistently.
Get quick testing steps, target ranges, and easy tips to help you test your pool water with confidence.Free Pool Test Kit Cheat Sheet
FAQs
How do you use a pool test kit?
Does where I draw pool water for testing matter?
How long should I wait before reading the results?
What affects the accuracy of pool test results?
What should I do if my readings are off?
How should I store a pool test kit?
Can I use a pool test kit right after adding chemicals?
Why are my pool test results inconsistent?
Are pool test kits better than test strips?
How do I know if my test kit is still accurate?
Was this post useful?


Questions/Comments
Have a question or thought? Click below to leave your comment.
Questions/Comments
Have a question or thought? Click below to leave your comment.