



TABLE OF CONTENTS
Key Takeaways
- Most pool problems come from small routine mistakes, not “bad water.”
- Brushing + circulation prevents buildup your vacuum can’t see.
- Shock works best when you add it correctly and at the right time.
- Ignoring pH/alkalinity can quietly damage liners, heaters, and pumps.
- Regular testing and filter care can help prevent many of the problems that lead to cloudy water.
The Pool Care Slip-Ups That Cause Cloudy Water (and Cost You Money)
Everyone loves a clean, sparkling pool until it turns into a cloudy, itchy, equipment-stressing money pit. And here’s the truth: most pool problems don’t start with a disaster. They start with one small habit that seems harmless… until it snowballs into cloudy water, algae, irritation, or equipment issues.
The good news? These mistakes are common, fixable, and usually don’t require anything fancy. In this guide, we’ll break down 13 pool maintenance mistakes (the ones pool owners make all the time) and the simple solutions that get your water back to clear, safe, and swim-ready.
Let’s start with the one mistake that can do the most damage fast.

Pro Tip
If you do three things consistently: test weekly, brush weekly, and run your pump long enough, you’ll prevent most “mystery problems” before they start.
Mistake #1: Adding Shock Directly Into the Pool Water
Pool shock is basically concentrated chlorine designed to knock out algae, bacteria, and other contaminants your regular sanitizer can’t always handle. It’s a must for keeping pool water clear and safe.
But dumping shock straight into the pool can backfire—fast.
When shock granules hit the floor and don’t dissolve evenly, they can:
-
-
Bleach vinyl liners (and make them brittle over time)
- Discolor painted surfaces
-
Cause temporary cloudiness
- And yes… bleach whatever’s in the water if levels are high enough (goodbye black swimsuit, hello weird pink)
-
Bleach vinyl liners (and make them brittle over time)
And if you have a vinyl liner, this mistake is especially risky. Granules can settle at the bottom, sit there, and “spot-bleach” your liner, turning your pool from a relaxing oasis into a repair project.
The Solution
Always follow the shock product label for application instructions.
If the product calls for pre-dissolving, fill a clean bucket with water first, then slowly add the shock according to the label directions.
Use the protective equipment specified on the product label, which may include:
-
- Protective eyewear
- Chemical-resistant gloves
- Respiratory protection, if required by the product label
Once dissolved, add the mixture according to the product directions with the pump running so it can circulate evenly.
Warning
Mistake #2: Not Brushing Your Pool
Algae can begin developing on pool surfaces before the growth becomes obvious. Regular brushing helps disrupt early buildup.
 DID YOU KNOW?
You already know vacuuming matters but vacuuming alone isn’t enough. Like your teeth (or your dog), your pool needs a good brush to look its best.
Even when the water looks clear, algae and grime can cling to pool walls, steps, and corners. Skip brushing and you’re basically letting buildup set up camp, which can lead to:
-
-
Slippery surfaces
-
Staining
-
Cloudy water that “won’t go away”
- More work for your filter (and more chemicals for you)
-
Slippery surfaces
Rule of thumb: brush and vacuum. If you’re doing both during the same maintenance session, brush first to loosen buildup, then vacuum any debris that settles.
The Solution
Use a pool brush with a pole long enough to reach the floor and full wall height. Focus on the spots where debris loves to hide:
-
-
Behind ladders
-
The waterline
-
Steps and stairs
- Corners and crevices
-
Behind ladders
Brushing loosens algae and stuck-on gunk so your filter can actually remove it instead of letting it cling to surfaces.
Brush at least once a week and more often during heat waves, storms, or heavy swim weeks.
Pro Tip
Brush toward the main drain (if you have one). It helps the loosened debris get pulled into circulation faster.
Mistake #3: Using Automatic Cleaners for Algae Problems
Automatic cleaners are awesome for everyday debris like leaves, dirt, bugs, the usual pool chaos. But when algae shows up, automatic cleaners can’t address the root of the problem.
It’s tempting, but don’t fire up your robotic cleaner.
Here’s why: algae isn’t just “stuff on the floor.” It’s a living contaminant that needs chemical treatment + removal.
And depending on your cleaner type, it can actually make things worse:
-
-
Robotic cleaners: the fine mesh bag can clog fast, and you’ll be rinsing it every five minutes
-
Pressure-side cleaners: can stir algae up and “redistribute” it like confetti
- Suction-side cleaners: can send algae straight into the filter and load it up quickly
-
Robotic cleaners: the fine mesh bag can clog fast, and you’ll be rinsing it every five minutes

Bottom line: cleaners move debris around well but they don’t solve algae at the root, and they often miss the spots algae loves (steps, seams, corners, behind ladders).
The Solution
When you’re dealing with algae, manual vacuuming is the best move — and you want it out of the system.
-
-
Vacuum manually (slowly, no aggressive sweeping)
-
Set your multiport valve to WASTE (or bypass the filter/drain per your setup)
-
Vacuum the algae out of the pool, not into your filter
- Refill the lost water and rebalance chemistry as needed
-
Vacuum manually (slowly, no aggressive sweeping)
Yes, you’ll lose some water. But you’ll also remove the algae completely instead of cycling it through your filter where it can settle again.

Pro Tip
Vacuum slow and steady. Fast passes kick algae up into a cloud and make it harder to remove.
Mistake #4: Ignoring pH and Alkalinity

pH and alkalinity are the backbone of your pool’s water balance. When they’re off, everything else starts falling apart: sanitizer gets less effective, water gets irritating, and equipment takes the hit.
Quick breakdown:
-
-
pH tells you how acidic or basic your water is.
- Alkalinity helps stabilize pH so it doesn’t swing wildly.
-
pH tells you how acidic or basic your water is.
What happens when pH is off
If your pH runs too low, your water becomes acidic. It can look “sparkly clean” at first, but acidic water can cause:
-
- Eye and skin irritation
- Corrosion and damage to pool surfaces and equipment
-
Premature wear on key components like:
- Pool pump
- Pool filter
- Vinyl liner
- Heater
- Automatic pool cleaner
- Chemical feeder
- Maintenance tools
- Solar blanket
If pH runs too high, chlorine becomes less effective, meaning algae and bacteria get way more comfortable than they should.
The Solution
Test weekly and keep your pH + alkalinity in the recommended ranges for your pool type. (Consistency beats “fixing emergencies.”)
When levels drift:
-
-
Use alkalinity increaser/decreaser first (so pH doesn’t bounce right back)
-
Then fine-tune with pH increaser/decreaser
-
Retest after adjustments and keep your pump running to circulate changes evenly
-
Use alkalinity increaser/decreaser first (so pH doesn’t bounce right back)
Pro Tip
If your pH keeps swinging, it’s usually an alkalinity issue first. Lock in alkalinity, and pH behaves.
Mistake #5: Backwashing Your Pool Filter Too Often
Backwashing is how you flush built-up gunk out of sand and D.E. filters by reversing the water flow and sending dirty water out through the waste line. It’s essential… but doing it too often is a surprisingly common mistake.
Here’s why: a filter actually works better with a light “dusting” of debris in it. That thin layer helps trap smaller particles and polish your water.
Backwash too frequently and you can:
-
-
Reduce filtration efficiency (your water may stay hazier)
-
Waste water and the chemicals you paid for
- Put extra wear on your system from unnecessary cycles
-
Reduce filtration efficiency (your water may stay hazier)
The Solution
Use your pressure gauge and filter manufacturer’s recommendations rather than backwashing on a fixed weekly schedule.
Right after backwashing, check your gauge and write that number down. Many systems may be ready for cleaning or backwashing when pressure rises about 8–10 PSI above the clean baseline, but the recommended threshold varies by system.
Pro Tip
Record your filter's clean starting pressure after backwashing. That gives you a baseline for recognizing when buildup begins restricting flow.
Why that works:
-
-
A little buildup improves filtration
-
Too much buildup restricts flow and circulation
- +8 to +10 PSI is a common sweet spot for flushing the “extra goop” and getting back to peak performance, but always follow your filter manufacturer’s recommended threshold.
-
A little buildup improves filtration
Also helpful:
Instead of backwashing constantly, do a periodic deep clean of the filter media (using a filter cleaner made for sand or D.E.). It helps restore efficiency and reduces how often you need to backwash.

Fun Fact
A “slightly dirty” filter can catch smaller particles better until pressure climbs and flow suffers.
Mistake #6: Adding Pool Shock Through Your Skimmer
IMPORTANT: DO NOT DO THIS!
Most pool mistakes are annoying. This one can be dangerous.
When you pour shock into the skimmer, it doesn’t go “into the pool.” It goes straight into your plumbing and equipment line. And if you have an automatic/inline chlorinator (or residual chlorine sitting in the system), you can trigger a chemical reaction in a tight, enclosed space.
The result?
Tiny chamber + chemical reaction + pressure = BOOM. (At best: equipment damage. At worst: toxic fumes.)
Depending on the products involved (especially calcium hypochlorite), that reaction can:
-
-
Release toxic chlorine gas
-
Damage your filter system, pump, and plumbing
- Create pressure buildup in the equipment line
-
Release toxic chlorine gas
The Solution
-
-
Never add shock through the skimmer.
-
Add shock exactly as the product label directs. Never introduce it through the skimmer unless the product and equipment manufacturers specifically instruct otherwise.
-
If pre-dissolving is required, follow the Mistake #1 rule: chemicals into water, never water into chemicals.
-
Keep the pump running as directed to help the treatment circulate.
- Wear the protective equipment specified on the product label and avoid breathing fumes.
-
Never add shock through the skimmer.
Warning
Mistake #7: Adding Shock During the Day
Chloramines are “used-up chlorine” compounds that cause that harsh chlorine smell and they’re often behind itchy skin and burning eyes.
Pool shock is designed to break down chloramines and oxidize the oils, sweat, sunscreen, and gunk your regular sanitizer can’t handle fast enough.
But doing it in broad daylight is basically handing your shock to the sun and saying, “Good luck.”
Most shocks are unstabilized (no UV protection). Sunlight can burn off free chlorine quickly, which means:
-
-
You get less cleaning power from the dose
-
You waste product (and money)
- Chloramines and organics can hang around longer than they should
-
You get less cleaning power from the dose
The Solution
Shock at dusk, in the evening, or at night when the sun is off the water. Then:
-
-
Run the pump while shocking (and for the label-recommended time) so it disperses evenly
-
Follow the label dosage for your pool size and current water condition
- Retest before swimming — don’t get in until free chlorine returns to a safe range for swimmers
-
Run the pump while shocking (and for the label-recommended time) so it disperses evenly

Pro Tip Shock after heavy use (party day, heat wave, rainstorm). Those are the moments that load your water with organics and make chlorine work overtime.
Mistake #8: Ignoring Calcium Hardness
Calcium hardness is the amount of dissolved calcium in your pool water and it matters more than most people think. When it’s out of range, your water starts taking it out on your pool (or your equipment).
If calcium is too low: the water gets “hungry” and can pull minerals from plaster/grout surfaces, which can lead to etching and surface wear.
If calcium is too high: it can cause cloudy water, scale buildup, and rough deposits on tile, heaters, and inside your plumbing.
Bottom line: calcium hardness helps protect surfaces and equipment but only when it stays in the sweet spot.
The Solution
Aim for calcium hardness in these ranges:
-
-
Vinyl pools: 175–225 ppm*
- Plaster / concrete pools: 200–275 ppm*
-
Vinyl pools: 175–225 ppm*
*The ideal calcium hardness range depends on your pool surface, equipment, sanitizer system, and manufacturer recommendations. Test the water regularly and maintain calcium hardness within the recommended range for your specific pool.
To fix low calcium hardness:
-
-
Add a calcium hardness increaser (especially at pool opening to set your baseline).
- Recheck periodically — evaporation and splash-out can shift levels over the season.
-
Add a calcium hardness increaser (especially at pool opening to set your baseline).
If you use calcium hypochlorite shock, you’re also adding calcium each time you use it. That can be helpful when calcium hardness is low, but keep an eye on your levels so they don’t creep too high over time.
Pro Tip If you’re fighting scale or cloudy water and your calcium hardness is high, avoid cal-hypo. Use a non-calcium sanitizer option (like liquid chlorine), and retest CH regularly until you’re back in range.
Mistake #9: Not Running Your Pool Filter System Long Enough
Plain and simple: your pool can’t get clean if the water isn’t moving.
Your filter only works when your pump is circulating water and shortening run time is one of the fastest ways to end up with:
-
-
Cloudy water (because debris never gets captured)
-
More surface junk + fine particles floating around
-
Higher algae risk from poor circulation and “dead zones”
- Extra strain on equipment as the system fights to catch up later
-
Cloudy water (because debris never gets captured)
Even if your pool looks fine, under-filtering lets contaminants build up quietly… until the water flips on you.
The Solution
Run your pool pump and filter at least 8 hours per day during swim season (and longer after heavy use, heat waves, or storms). If you want a simple benchmark: aim for 1–2 full water “turnovers” per day (meaning the pool’s full volume circulates through the system 1–2 times, based on pool size + pump).
To make it easier:
-
- Use a timer so you’re not guessing
- Run it during the warmest part of the day if you can (that’s when algae pressure is highest)
- If your pool still looks dull, increase run time before you start dumping in extra chemicals

Pro Tip If you’re battling cloudiness, run the filter longer first as chemicals can’t fix water that isn’t circulating.
Mistake #10: Not Testing Pool Water Weekly
Most “chlorine smell” complaints aren’t from too much chlorine. They’re often from imbalanced water or chloramines that show up when sanitizer gets overwhelmed.
DID YOU KNOW?
Skipping water tests is how “totally fine” pool water turns into cloudy water, algae, or irritated eyes… seemingly overnight.
A quick weekly test helps you catch small chemistry drift before it becomes:
-
-
Algae growth
-
Burning eyes / itchy skin
-
Cloudy water that won’t clear
-
Extra wear on your pump, heater, and filter
-
Algae growth
Because the truth is: your pool can look clean and still be chemically off.
The Solution
Test your pool water at least once a week using test strips or a liquid test kit (and test more often during heat waves, heavy use, or storms).
Start with the basics every week:
-
-
Free chlorine (sanitation)
-
pH (comfort + chlorine effectiveness)
- Total alkalinity (pH stability)
-
Free chlorine (sanitation)
Then spot-check the “supporting” levels on a simple schedule (weekly/biweekly/monthly depending on your setup):
-
-
Calcium hardness
- Cyanuric acid (stabilizer)
-
Salt + total dissolved solids (TDS); if applicable
- Metals (copper/iron); especially if you’re on well water or seeing staining
-
Calcium hardness

Pro Tip Keep a simple test log in your Notes app. If something goes sideways, your last 2–3 readings usually reveal exactly what changed.
Catch imbalances before they turn into cloudy water or algae.Test Weekly, Swim Happy
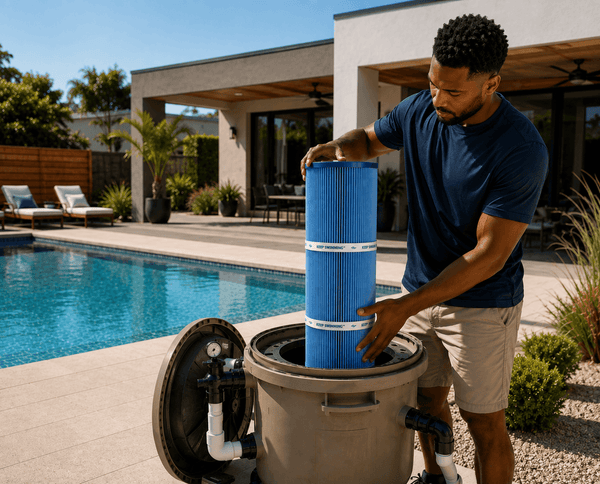
Mistake #11: Neglecting Pool Filter Cleaning or Replacement
Your filter is your pool’s cleanup crew. If it’s clogged or worn out, your water can’t get (or stay) clear, no matter how much chemistry you throw at it.
When your filter is overdue, you’ll usually notice:
-
-
Cloudy or dull water that won’t clear up
-
More debris floating around (or settling faster)
-
Higher chemical demand because gunk stays in circulation
- Reduced flow and extra strain on your pump + equipment
-
Cloudy or dull water that won’t clear up
Translation: Ignore your filter and small problems turn into expensive ones.
The Solution
Keep your filter working like it should with a simple routine:
-
-
Watch your pressure gauge: compare it with your clean baseline and clean or backwash according to your filter manufacturer’s recommended pressure threshold.
-
Clean/backwash on a schedule (based on your filter type):
- Cartridge: inspect regularly and clean when pressure, reduced flow, visible debris, or manufacturer guidance indicates cleaning is needed.
-
Sand: backwash as needed when pressure climbs
-
D.E.: backwash when needed, then recharge with fresh D.E. per label
-
Replace cartridges when they’re done (often every 1–2 years, sooner if):
-
Pleats stay stained or collapse
-
The cartridge won’t clean up anymore
-
Water stays cloudy even after balancing + shocking
-
Pleats stay stained or collapse
- Inspect for damage: check for cracks, tears, leaks, or broken bands/seals and fix fast before it escalates.
-
Watch your pressure gauge: compare it with your clean baseline and clean or backwash according to your filter manufacturer’s recommended pressure threshold.

Pro Tip If pleats stay stained, collapse, or water won’t clear after cleaning + balancing, it’s likely replacement time.
Fresh cartridges restore flow and catch the fine stuff.Your Filter Can’t Work If It’s Worn Out
Mistake #12: Wearing Inappropriate Clothing in the Pool
Swimwear isn’t just a fashion choice. It’s pool maintenance.
Jeans, t-shirts, and “whatever was closest” aren’t made for the chlorine catwalk. They can:
-
-
Shed fibers (hello, cloudy water + clogged filter)
-
Release detergent residue that messes with water balance
-
Bleed dyes (especially with higher chlorine levels)
- Add extra grime your sanitizer now has to fight
-
Shed fibers (hello, cloudy water + clogged filter)
And the pool’s chemicals don’t play nice with everyday fabrics either. The result? Fading, discoloration, and the occasional accidental tie-dye moment that was not in the forecast.
So yeah… don’t let your pool become the next fashion disaster. Keep it chic with real swimwear.
The Solution
-
-
Wear proper swimwear (nylon / polyester / spandex)
-
Skip cotton tees + street clothes (fiber shedding is real)
-
Rinse new suits before the first swim (and rinse suits well after washing)
-
If guests are coming over, give a quick heads-up: swimwear only
-
Wear proper swimwear (nylon / polyester / spandex)
Pro Tip
If your water keeps getting cloudy “for no reason,” check the wardrobe. Cotton fibers + detergent residue can overwhelm filtration fast.
Mistake #13: Allowing Pets to Swim Without Precautions
More organics in the water = sanitizer gets used up faster. That’s why pools can look “fine” and still test off after pet days.
DID YOU KNOW?
We love a pool dog. But pets don’t just bring good vibes, they bring extra maintenance.
Dogs can introduce more contaminants than people:
-
-
Hair that clogs skimmers and filters
-
Natural oils + dirt that increase chlorine demand
- Residue from shampoos, flea/tick products, or grooming sprays that can mess with water clarity (and sometimes cause foam)
-
Hair that clogs skimmers and filters
The good news? A few extra maintenance habits can help manage the additional hair, oils, dirt, and other contaminants your dog introduces into the water.
The not-so-good news? Your pool will need a little extra support to keep up.
The Solution
If your pet swims, add these habits to your routine:
-
-
Rinse before + after: Quick rinse before to cut dirt/oils. Rinse after to remove chlorine from their coat.
-
Brush regularly: Less shedding on land = less shedding in the pool.
-
Vacuum after swim sessions: Especially if your dog likes launching off steps or rolling on the ledge.
-
Clean the filter more often: Expect higher debris load and faster pressure rise.
- Use a skimmer sock or hair catcher: An easy way to trap fur before it hits the filter media.
-
Rinse before + after: Quick rinse before to cut dirt/oils. Rinse after to remove chlorine from their coat.
Pro Tip
If your filter pressure climbs faster than normal after your pet has been swimming, check the skimmer and filter for accumulated hair and debris before adding extra chemicals.
Every Mistake Is a Step Toward Pool Perfection
Nobody runs a perfect pool 24/7. The goal is simple: catch small issues early so they don’t turn into cloudy water, algae, or expensive equipment problems.
Lock in the basics: test weekly, brush weekly, run your pump long enough, and keep your filter in good shape and you’ll spend way less time troubleshooting… and way more time actually using your pool.
Here’s to clearer water, smoother maintenance, and fewer “why is it like this?” moments.
Happy swimming!
Get Pool Care Tips Without the Trial-and-Error
Weekly water-care habits, seasonal checklists, and quick fixes that keep your pool clear.
Related Articles



FAQs
How often should I test my pool water?
When should I shock my pool?
Can I shock my pool and swim the same day?
How long should I run my pool pump each day?
Why does my pool look cloudy even though chemicals test “normal”?
How do I know when to clean or backwash my pool filter?
Should I backwash my filter on a schedule?
How often should I replace my pool filter cartridge?
Should I brush my pool if I vacuum regularly?
Do I still need to brush if I have a robotic cleaner?
Was this post useful?


Questions/Comments
Have a question or thought? Click below to leave your comment.
Questions/Comments
Have a question or thought? Click below to leave your comment.